
Besan cheese chilla with Vegetables Stuffing Recipe
Besan Cheese Chilla
I got this recipe to my inbox this morning . I just sat down and took my first bite and oh my god. Instant repeat. I think my tomatoes, capsicum, onion & corn were diced a little too chunky so probably will do crushed next time but otherwise no notes. 10/10 will definitely be making again!!
Besan cheese chilla is a mouthwatering Indian pancake made with gram flour (besan) and filled with gooey melted cheese. This delightful dish combines the earthy flavors of gram flour with the richness of cheese, resulting in a savory and satisfying snack or breakfast option.
The besan batter is seasoned with a blend of spices like red chili powder, turmeric, and cumin, which infuses the chilla with a burst of aromatic flavors. Finely chopped onions, tomatoes, green chilies, and herbs can be added to further enhance the taste and provide a delightful crunch.
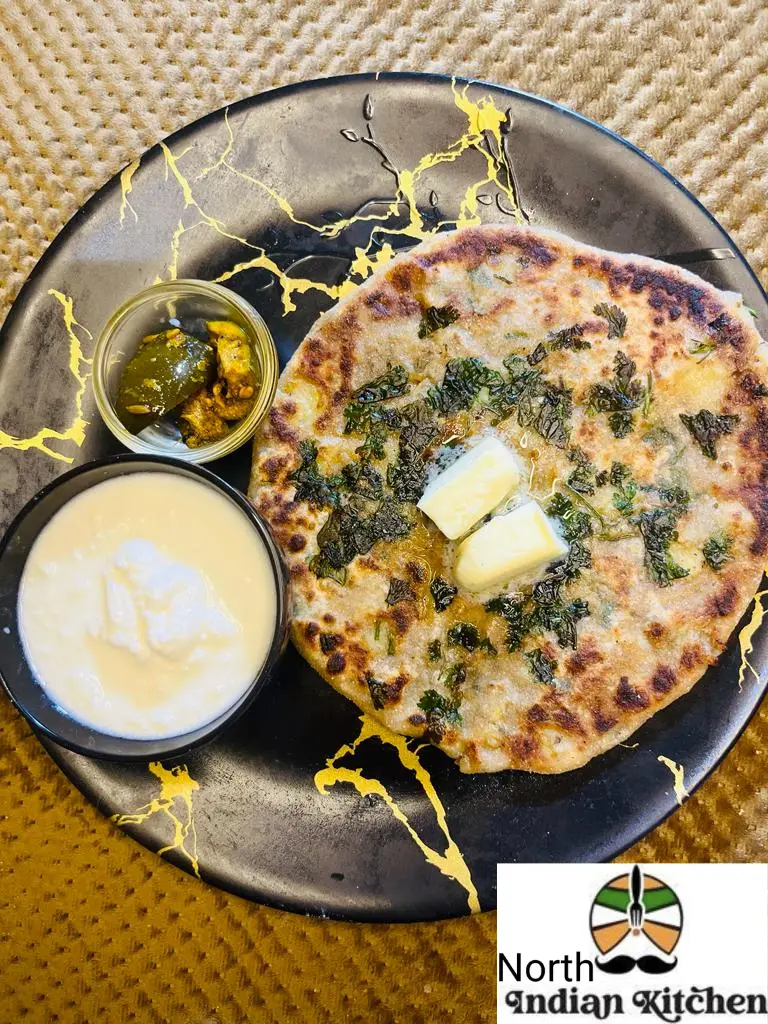
When cooked on a non-stick pan or griddle, the besan cheese chilla transforms into a golden-brown pancake with a crispy exterior and a cheesy, melty center. It is typically served hot, paired with tangy chutney, homemade mint chutney, ketchup, or cooling yogurt, which perfectly complements the flavors.
Besan cheese chilla is a versatile dish that allows for endless variations and experimentation. You can explore different cheese types, add in your favorite vegetables, or adjust the spice levels to suit your palate. Its simplicity and quick preparation make it a popular choice for a satisfying snack or a light meal on the go.
Whether you’re looking for a flavorful breakfast, a delicious snack, or an appetizer to impress your guests, besan cheese chilla is a delightful option that brings together the best of Indian flavors and cheesy goodness.
In This Post: Everything You Need For This Besan Cheese Chilla
🔘It’s full of Nutrition
🔘Beneficial for Elders & Kids
🔘Combination of Healthy vegetables & Snack
This whole thing eats almost like a Chinese snack– big spoons to have, saucy goodness going onto each plate – with the couscous bringing the chewy bite, the american corns giving it some oomph, and the canned tomatoes and herbs bringing the happy illusion of sunshine in the starting of summer.
I’ve been serving this with a little side of sliced cheese, which I like so much that I included it here. It’s not really enough to call a chilla, because it’s just cheese chilla that gets a gentle little spa treatment, but it’s just the right thing to provide some brightness and crunch and pack in some greens for the day.
Maybe I am a child, but my favorite part of this recipe is the stuffing in Step 1 because it helps make the texture more interesting and gives it a very slight feeling of rich creaminess. Plus… mashing things is fun.

How to make Besan Cheese Chilla
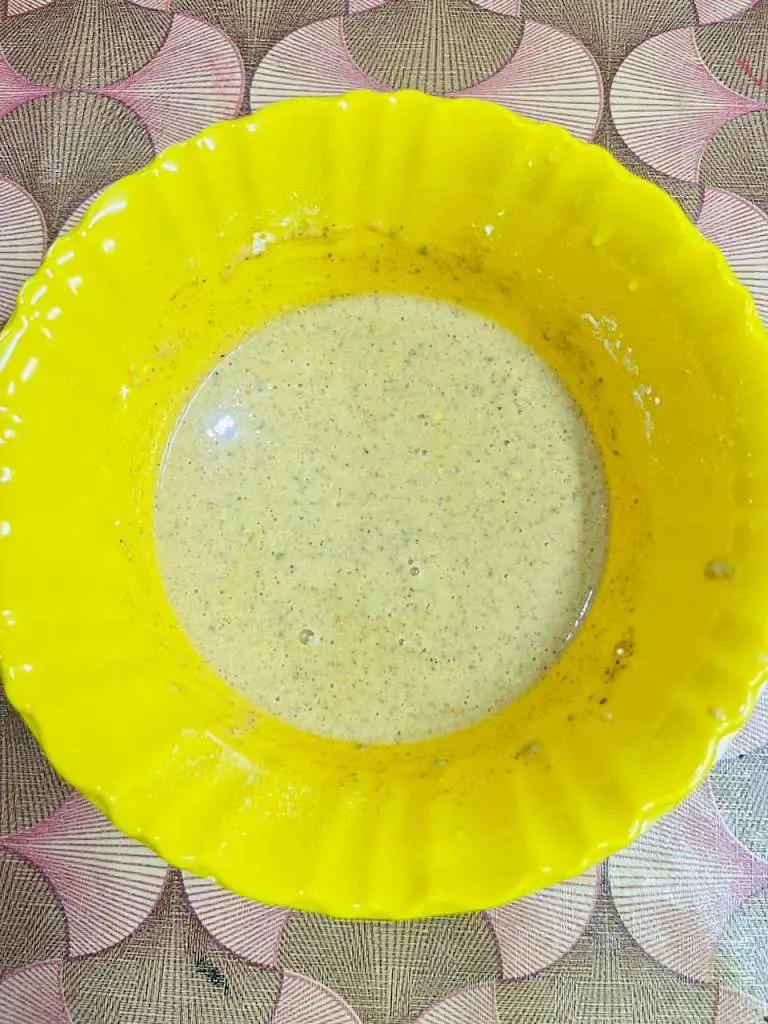
Prepare Besan Chilla Batter
- In a mixing bowl gram flour. Mix nicely . Add 1/4 -1/2 cup water at a time and whisk the batter. Keep whisking the batter till it is silky smooth, lump free, and of drooping consistency.Let it rest for 10-15 minutes at room temperature.
- After resting time , add the seasoning, 1/4 cup more water and again whisk the batter to combine all the ingredients. The chilla batter is ready.
Prepare Chilla Filling
- Combine all the vegetables,spices and salt in a mixing bowl. Mix nicely. Taste and add more seasoning if required. The filling for chilla is ready.
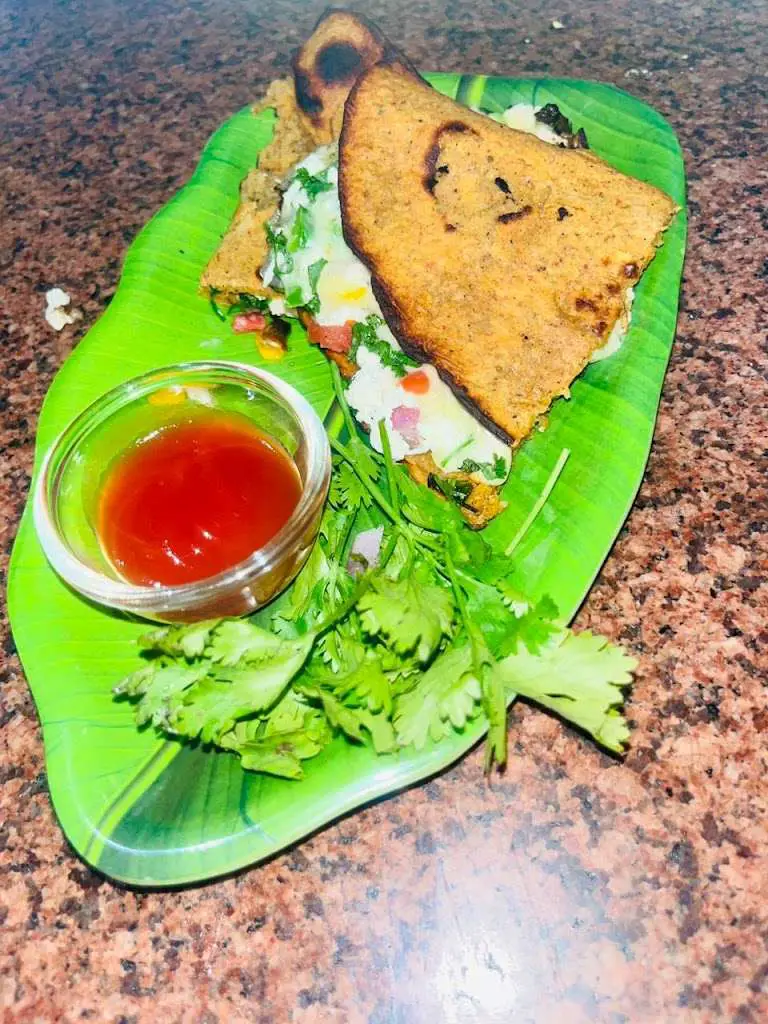
Besan Chilla -Style 1
- Heat a heavy bottom, thick pan over high heat. Once the hot fumes start coming from the pan, sprinkled water evaporate, and wippe the excess water from the pan.
- Take a ladle full of chilla batter and spread it like a dosa or thin crepe in the hot pan. Drizzle a teaspoon of ghee on the edges of the chilla. Let it cook. Do not flip.

- Spread a teaspoon tomato ketchup on the chilla. Add 2 tablespoons of filling, 2 tablespoon of grated paneer, and 1 slice cheese. Press the stuffing gently using a spatula.

- Once the chilla is crisp, fold it into half and serve immediately
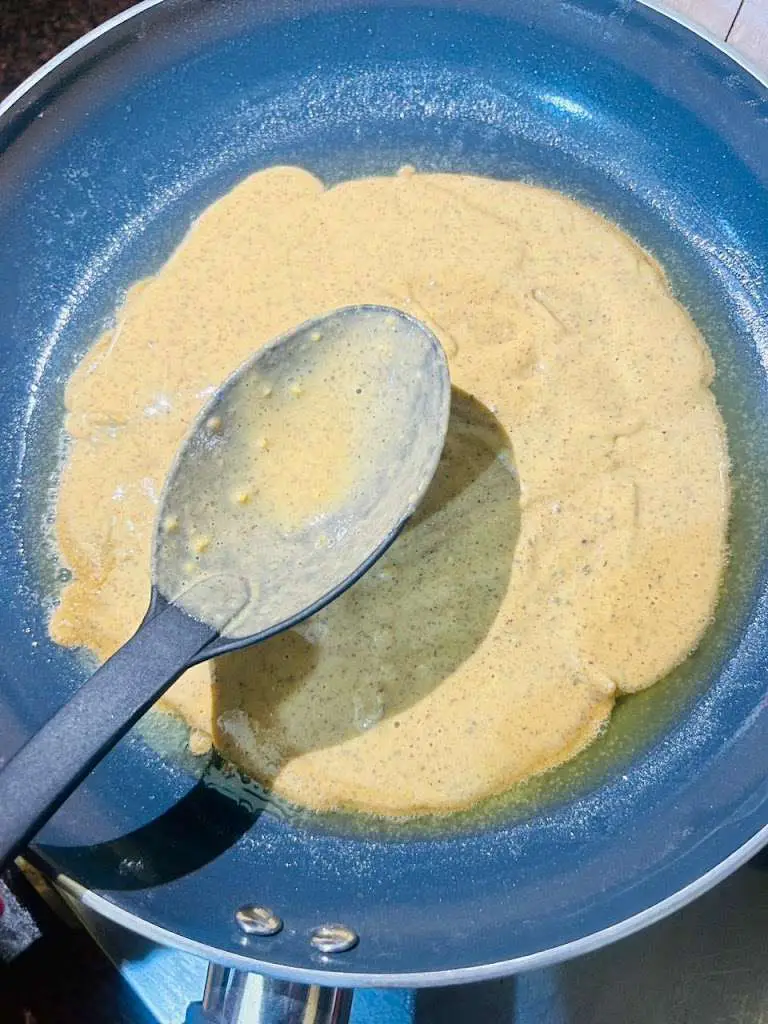
Besan Chilla – Style 2
1. Once the chilla batter and filling are ready, combine them. Whisk the batter and add more waterto get a spoon dropping smooth consistency.
2. Heat a heavy bottom, thick pan over high heat. Brush the pan with a teaspoon a ghee.
3. Take a laddle full of chilla batter and spread it on the pan like a pancake. It is slightly thick and uneven. Drizzle a teaspoon of ghee on chilla, cover it with a lid, and cook for 1-2 minutes over medium heat.
4. Remove the lid, flip the chilla, and cook from other side for 10-20 sec. Serve Besan chilla immediately with chutney and ketchup.
Expert Tips
Consistency of the batter: The consistency of the besan batter is crucial for making a good chilla. It should be smooth and flowing, similar to pancake batter. Gradually add water to the besan while whisking to achieve the right consistency. Start with less water and add more as needed to avoid a runny batter.
Resting time: Allow the besan batter to rest for at least 15-20 minutes before making the chilla. This helps the flavors to develop and allows the besan to absorb the water, resulting in a better texture.
Seasoning: Add spices and seasonings to enhance the flavor of the chilla. Common additions include salt, red chili powder, turmeric powder, cumin powder, and finely chopped green chilies. You can also add finely chopped onions, tomatoes, or herbs like coriander leaves for added taste.
Cheese selection: Choose a cheese that melts well, such as cheddar, mozzarella, or processed cheese. Grate or crumble the cheese and spread it evenly on the chilla while cooking. You can use as much or as little cheese as you prefer.
Non-stick pan or griddle: Use a non-stick pan or griddle to make the chilla. This helps prevent sticking and allows for easy flipping. If using a cast-iron or stainless steel pan, make sure to grease it lightly with oil or ghee to avoid sticking.
Heat control: Maintain medium heat while cooking the chilla. This ensures that the chilla cooks evenly without getting burnt or undercooked. Adjust the heat as needed to achieve a golden-brown color and crispy texture.
Spreading the batter: Pour a ladleful of besan batter onto the pan and spread it gently in a circular motion to form a thin and even chilla. You can use the back of the ladle or a spatula to spread the batter.
Cooking time: Cook the chilla on one side until it turns golden brown and the edges start to crisp up. Then, flip it over and cook the other side until it is cooked through and the cheese has melted. Adjust the cooking time based on your desired level of crispness.
Serving suggestion: Serve besan cheese chilla hot with chutney, ketchup, or yogurt for dipping. You can also roll it up with some fresh vegetables, chutney, and a dash of lemon juice to make a delicious wrap.
Experiment with fillings: While cheese is a classic filling for besan chilla, feel free to experiment with other fillings like sautéed vegetables, paneer (Indian cottage cheese), mushrooms, or spinach. This adds variety and enhances the flavor of the chilla.
FAQs
Q: Can I make besan cheese chilla without cheese?
A: Yes, you can definitely make besan chilla without cheese. Simply omit the cheese from the recipe, and you will still have a tasty and flavorful besan chilla. You can add other ingredients like vegetables, spices, or herbs to enhance the taste.
Q: Can I use any type of gram flour (besan) for making chilla?
A: Besan or gram flour is traditionally used for making chilla. However, you can experiment with other types of flour like chickpea flour or a blend of flours to suit your preference. Keep in mind that different types of flour may yield slightly different results in terms of texture and flavor.
Q: How do I prevent the chilla from sticking to the pan?
A: To prevent the chilla from sticking to the pan, make sure to use a non-stick pan or griddle. If using a cast-iron or stainless steel pan, lightly grease it with oil or ghee before pouring the batter. Also, ensure that the pan is adequately preheated before pouring the batter.
Q: Can I make besan cheese chilla in advance and reheat it?
A: While it is best to enjoy besan cheese chilla fresh and hot, you can make them in advance and reheat them if needed. To reheat, place the chilla on a hot griddle or pan for a few minutes until heated through. However, note that the chilla may lose some crispness upon reheating.
Q: Can I make besan cheese chilla without onions and garlic?
A: Yes, you can skip onions and garlic if you prefer or if you have dietary restrictions. Besan cheese chilla will still be flavorful with the addition of other spices and seasonings. Feel free to customize the recipe based on your preferences and dietary needs.
Q: Can I freeze besan cheese chilla?
A: It is not recommended to freeze besan cheese chilla as the texture and taste may be affected upon thawing and reheating. It is best to enjoy them fresh for the best flavor and texture.
If you like this recipe then must try other Breakfasts also:
Please be sure to rate the recipe in the recipe card or leave a comment below if you have made it. For more veetarian inspirations, Sign Up for my emails or follow me on Instagram, Youtube, Facebook , Pinterest or Twitter.

Besan Cheese Chilla Recipe Card
Equipments
Ingredients
For Chilla Batter
- 1 cup Gram Flour(Besan)
- 1 cup Water
- Salt to taste
- 1 teaspoon Ginger & garlic paste
- ½ teaspoon Turmeric powder
- 1 teaspoon Red chili powder
- 1 teaspoon Cumin powder
For Chilla Filling
- ¼ cup Sweet corn
- ¼ cup Bell pepper (finely chopped)
- ¼ Onion (finely chopped)
- 2 tablespoon Fresh Coriander (chopped)
- Salt to taste
- 1 teaspoon Chaat Masala
- 1 teaspoon Cumin powder
- ½ teaspoon Red chili powder
- ¼ cup Tomato ketchup
- 1 cup Paneer (grated)
- ¼ cup Ghee(clarified butter)
Instructions
- INSTRUCTIONS1. In a mixing bowl take gram flour. Add 1/4 -1/2 cup water at a time and whisk the batter. Keep whisking the batter till it is silky smooth, lump free, and of drooping consistency. Let it rest for 10-15 minutes at room temperature.2. After resting time , add the seasoning, 1/4 cup more water and again whisk the batter to combine all the ingredients. The chilla batter is ready.Prepare Chilla Filling3. Combine all the vegetables, spices and salt in a mixing bowl. Mix nicely. Taste and add more seasoning if required. The filling for chilla is ready.Besan Chilla -Style 14. Heat a heavy bottom, thick pan over high heat. Once the hot fumes start coming from the pan, sprinkled water evaporate, and wipe the excess water from the pan.5. Take a ladle full of chilla batter and spread it like a dosa or thin crepe in the hot pan. Drizzle a teaspoon of homemade ghee on the edges of the chilla. Let it cook. Do not flip.6. Spread a teaspoon tomato ketchup on the chilla. Add 2 tablespoons of filling, 2 tablespoon of grated paneer, and 1 slice cheese. Press the stuffing gently using a spatula.7. Once the chilla is crisp, fold it into half and serve immediatelyBesan Chilla - Style 21. Once the chilla batter and filling are ready, combine them. Whisk the batter and add more waterto get a spoon dropping smooth consistency.2. Heat a heavy bottom, thick pan over high heat. Brush the pan with a teaspoon a ghee.3. Take a laddle full of chilla batter and spread it on the pan like a pancake. It is slightly thick and uneven. Drizzle a teaspoon of ghee on chilla, cover it with a lid, and cook for 1-2 minutes over medium heat.4. Remove the lid, flip the chilla, and cook from other side for 10-20 sec. Serve Besan chilla immediately with chutney and ketchup.Batter: The chilla batter should be silky smooth, lump-free, and of thick spoon dropping consistency. I use 1 cup of water to get the desired consistency. If the batter seems too thick add more water as gram flour absorbs a lot of water.Resting: Let the batter rest for 10-15 minutes before making the chilla.Pan: Try to use a thick, heavy bottom pan for making the chilla. Make sure the pan is hot before adding the batterChilla Style 1: If you are making dosa style chilla DO NOT grease the pan with oil. Sprinkle water and wipe it clean. No need to flip the chilla.Chilla Style 2 :After adding the vegetables if the batter seems too thick, add 1-2 tablespoon of water to get the spoon dropping consistency.
Video
Notes
- Besan cheese chilla is a savory pancake made with gram flour (besan) and cheese.
- The besan batter should have a smooth, flowing consistency similar to pancake batter.
- Allow the batter to rest for at least 15-20 minutes to develop flavors and improve texture.
- Season the batter with spices like salt, red chili powder, turmeric powder, and cumin powder. Add finely chopped green chilies, onions, tomatoes, or herbs for additional taste.
- Choose a cheese that melts well, such as cheddar, mozzarella, or processed cheese.
- Use a non-stick pan or griddle to make the chilla and maintain medium heat while cooking.
- Spread the batter evenly in a circular motion to form a thin chilla.
- Cook until golden brown on one side, then flip and cook the other side until cooked through and cheese has melted.


Wow 😲 healthy recipe
Thanks for your feedback. We are very glad that you like our recipes.
Beneficial recipe for health
Thanks for your feedback. We are very glad that you like our recipes.