
Easy Indian Rice Pudding Recipe | Homemade Kheer with Dry Fruits
In India there are many desserts but Kheer, is one of the most loved ones. It is also known as rice pudding, is an exquisite and timeless Indian dessert that has captured the hearts of people for centuries. Its velvety texture, sweet aroma, and delicate flavors make it a cherished treat during festivals, celebrations, and even everyday indulgence.
Kheer is a dessert that transcends time and borders, captivating hearts and taste buds with its delectable charm. Its simplicity in ingredients and preparation process makes it accessible to all, while its versatile nature allows for endless experimentation and innovation.
So, the next time you’re craving something sweet and comforting, why not immerse yourself in the velvety goodness of kheer and experience the magic it brings to your palate.
Origins and Significance
Kheer holds a significant place in Indian culinary heritage and is steeped in tradition. It’s origins can be traced back to ancient times, with references to a similar dish found in the famous Indian epic, Mahabharata. It was considered an offering to the deities during religious ceremonies and was often served in temples and at auspicious occasions.
Ingredients and Variations
While rice is the primary ingredient in kheer, there are various regional and cultural adaptations that give rise to delightful variations. The classic recipe typically includes rice, milk, sugar and fragrant ingredients such as cardamom, saffron, and rosewater. However, depending on the region, one might come across unique variations like vermicelli kheer, carrot kheer, paneer kheer, or even the decadent dry fruit kheer.
Preparing the Perfect Kheer
Creating a heavenly bowl of kheer requires patience, precision, and a dash of love. Here is a step-by-step guide with pics to preparing this divine dessert:
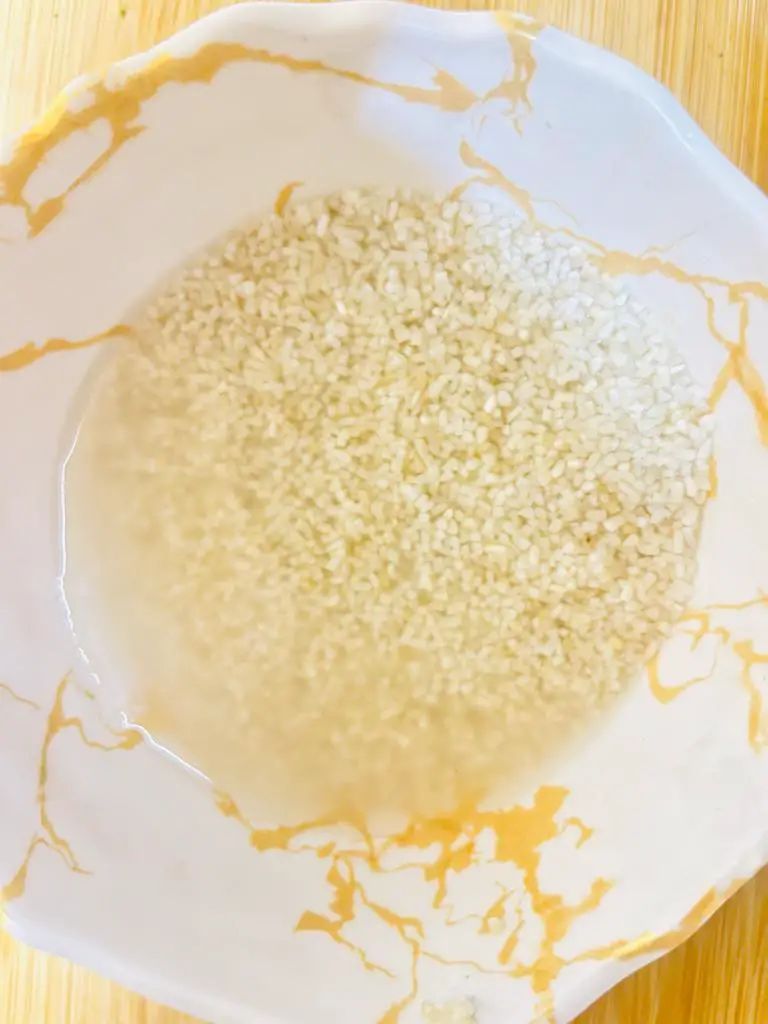
- Wash and soak the rice: Begin by washing 1/4 cup rice thoroughly to remove any impurities. Keep in mind that rice should be half cut, don’t use basmati rice in kheer. Then, soak it in water for about 30 minutes. This step ensures even cooking and a creamy texture.
- Boil the milk: In a heavy-bottomed pan, bring 1 litre milk to a gentle boil. Stir occasionally to prevent it from scorching.
- Add the rice: Drain the soaked rice and add it to the boiling milk. Lower the heat to a simmer and cook until the rice is soft and tender. Stir occasionally to prevent sticking.

- Sweeten and flavor: Once the rice is cooked, add sugar as required, 3-4 green cardamoms and 1/4 cup chopped almonds.
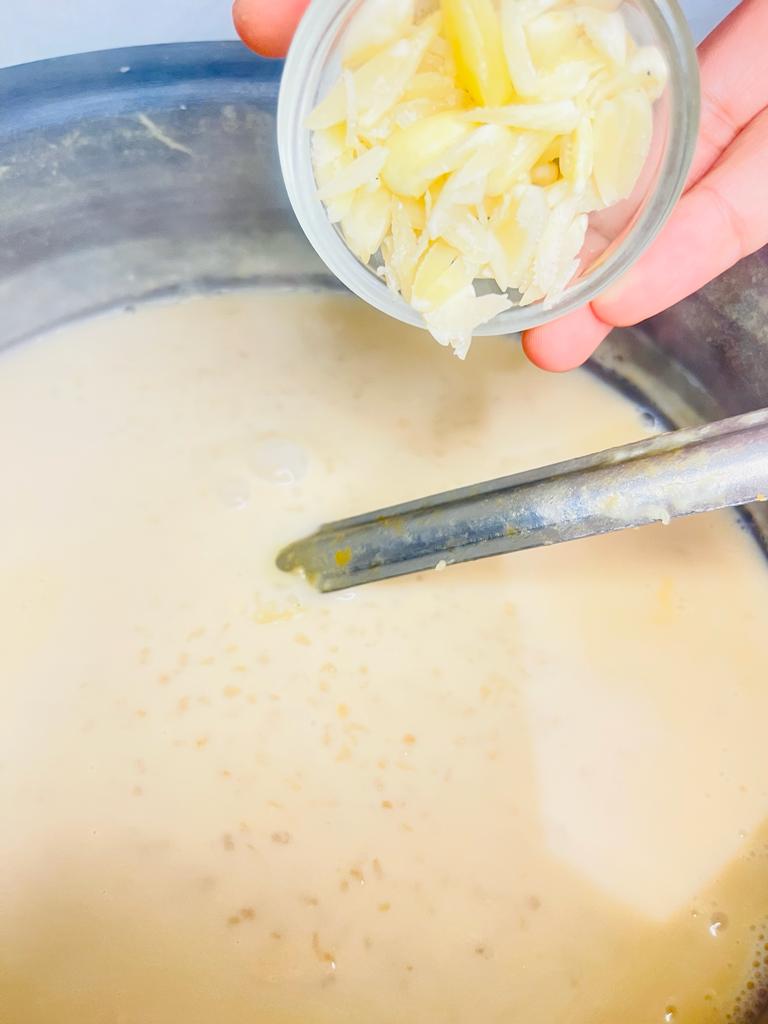
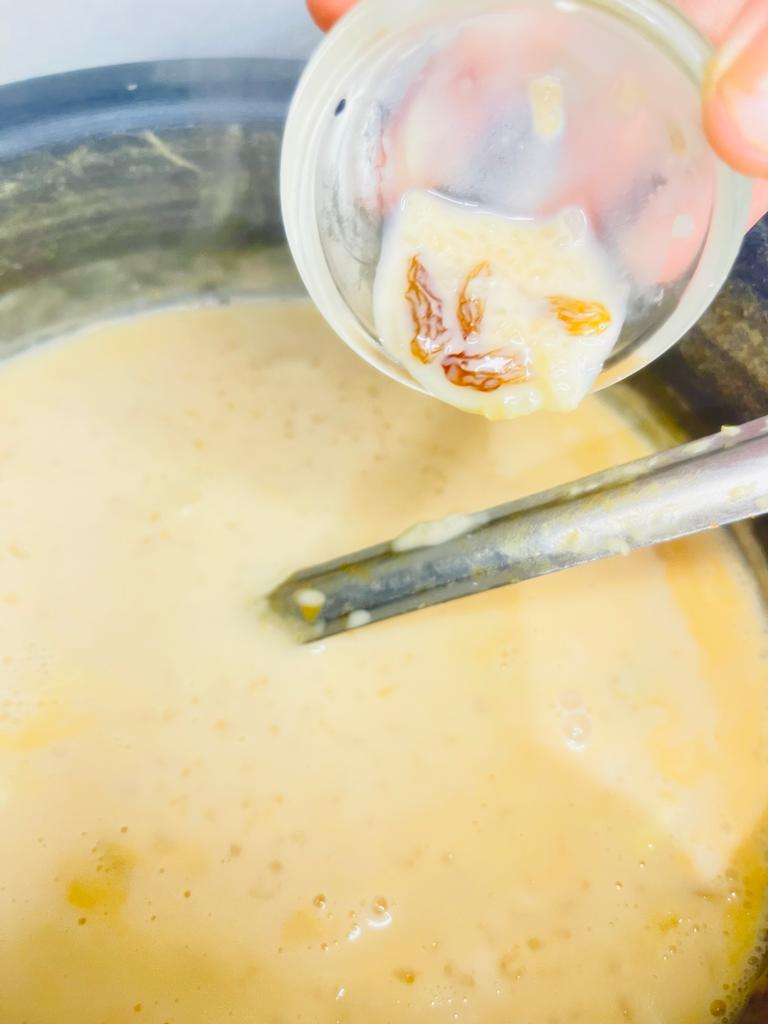
- Afterwards append 1/4 cup raisins in to the kheer. Stir well to combine all the ingredients.
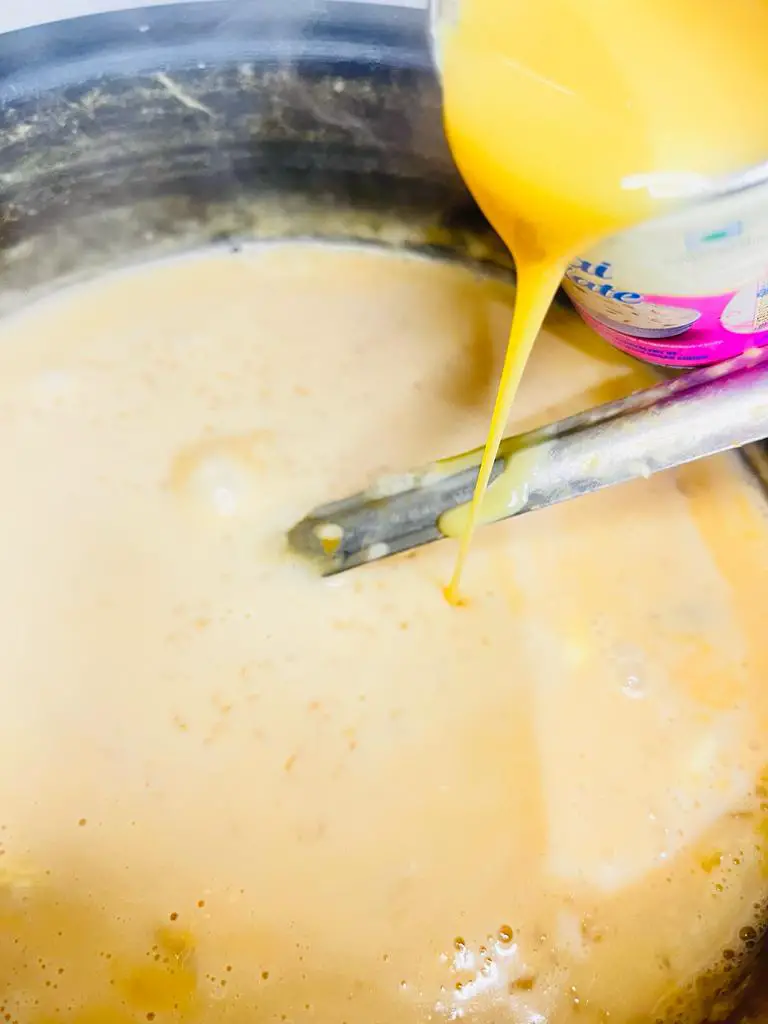
- Add 200 grams condensed milk to give extra taste and thicken the kheer.
- Simmer to perfection: Allow the kheer to simmer on low heat for another 15-20 minutes, stirring occasionally. This slow cooking process allows the flavors to meld together, and the rice to absorb the milk, resulting in a thick and creamy consistency.
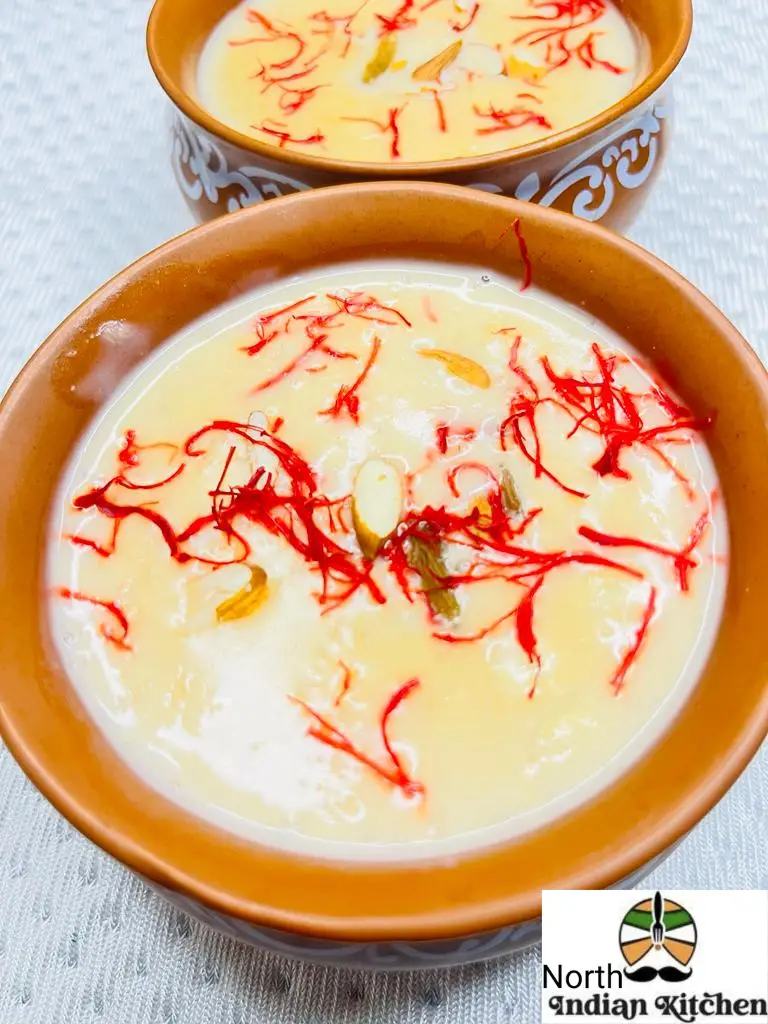
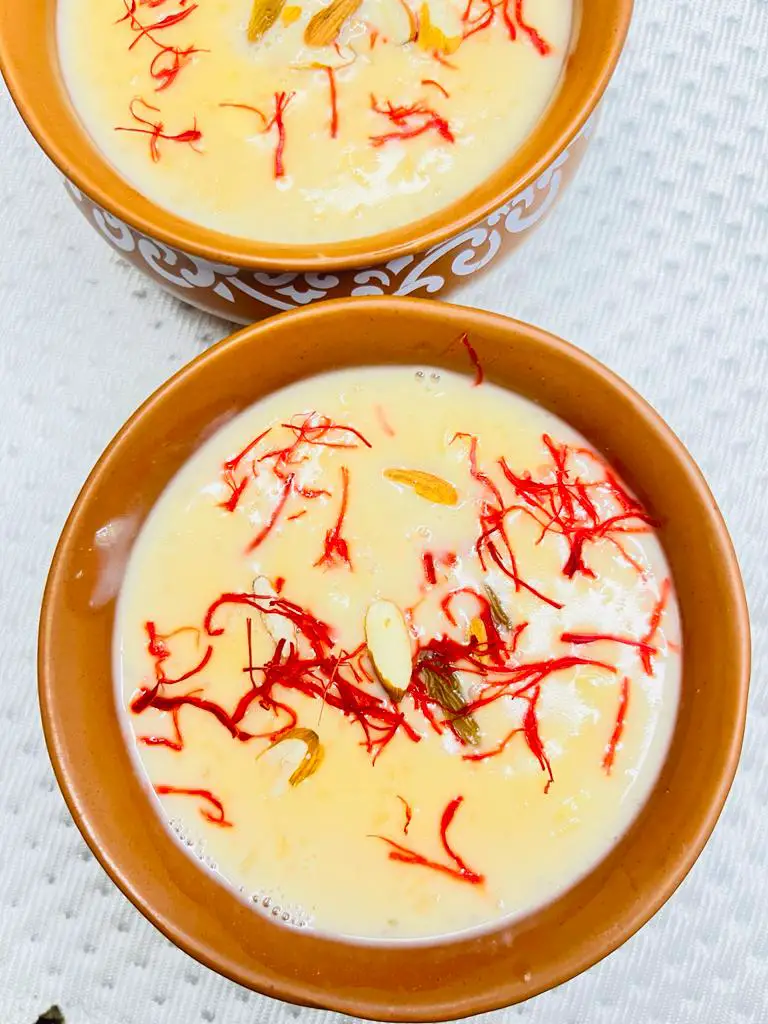
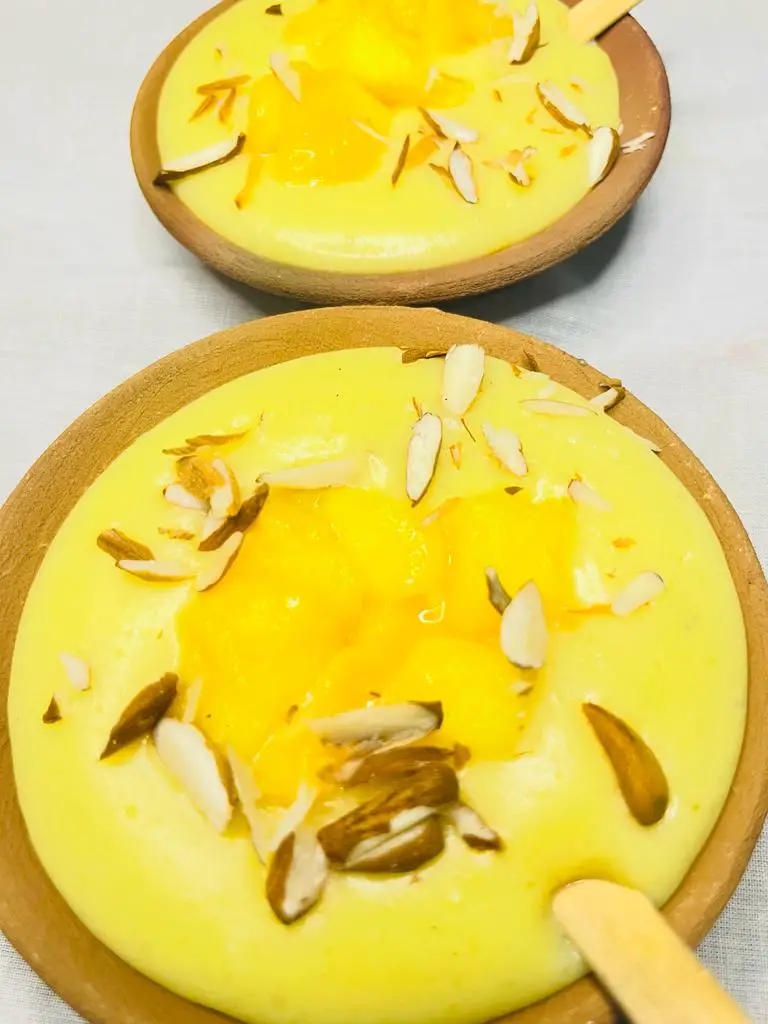
- Garnish and serve: Once the kheer reaches the desired consistency, remove it from the heat. Garnish with a sprinkle of chopped nuts, saffron strands, or rose petals for an elegant touch. Serve warm or chilled, depending on personal preference.
Savoring the Divine
Kheer is a dessert best enjoyed slowly, relishing every spoonful of its creamy goodness. The combination of aromatic spices, the natural sweetness of the rice, and the richness of the milk create a harmonious symphony of flavors that delights the senses. Whether served as a standalone dessert or as a finale to a sumptuous meal, kheer is a crowd-pleaser that leaves a lasting impression.
Expert Tips
Choose the right rice: Use a short-grain rice variety like basmati or any other variety specifically recommended for making kheer. These rice grains release starch during cooking, contributing to the creamy texture of the dessert.
Soak the rice: Soaking the rice before cooking helps in achieving a softer texture and even cooking. It also reduces the cooking time and ensures that the rice absorbs the flavors of the milk and spices.
Use full-fat milk: For the richest and creamiest kheer, opt for full-fat milk. The higher fat content contributes to the luscious texture and enhances the overall taste of the dessert.
Slow-cook on low heat: Patience is key when preparing kheer. Simmer the mixture on low heat, allowing the rice to cook slowly and absorb the flavors of the milk. Stir occasionally to prevent the rice from sticking to the bottom of the pan.
Add sweeteners mindfully: Start with a moderate amount of sugar, as the sweetness will intensify as the kheer reduces and thickens. You can always add more sugar if needed, but be cautious not to over-sweeten the dish.
Enhance with aromatic spices: Traditional kheer recipes call for cardamom powder, saffron strands, and sometimes rosewater. These ingredients add a fragrant touch to the dessert, elevating its taste and aroma. Use them sparingly, as their flavors can be overpowering if used excessively.
Experiment with variations: While the classic kheer recipe is timeless, feel free to experiment with different ingredients. Try adding a handful of roasted nuts like almonds, pistachios, or cashews for added texture and flavor. You can also incorporate dried fruits, such as raisins or chopped dates, to lend a delightful sweetness.
Garnish thoughtfully: The presentation of kheer can be enhanced with a beautiful garnish. Sprinkle some finely chopped nuts, like pistachios or almonds, over the top, or add a few strands of saffron for an elegant touch. Fresh rose petals can also add a touch of visual appeal.
Serve it right: Kheer can be enjoyed warm or chilled, depending on personal preference. If serving chilled, refrigerate the kheer for a few hours before serving to allow it to set and develop its flavors. If serving warm, make sure to let it cool slightly to a comfortable eating temperature.
Store and reheat properly: If you have leftovers, store them in an airtight container in the refrigerator. Kheer tends to thicken when refrigerated, so add a little warm milk while reheating to restore its desired consistency. Reheat gently on the stovetop or in the microwave, stirring occasionally to ensure even heating.
FAQs
Q: Can I use any type of rice to make kheer?
A: It is recommended to use short-grain rice like basmati or any other variety specifically meant for making kheer. These rice grains release starch during cooking, resulting in a creamy texture. Avoid using long-grain or sticky rice as they may not yield the desired consistency.
Q: Can I use low-fat milk instead of full-fat milk?
A: Full-fat milk is preferred for making kheer as it provides a rich and creamy texture. However, you can use low-fat milk if desired. Keep in mind that the final texture may be slightly less creamy.
Q: How long does it take to cook kheer?
A: The cooking time for kheer can vary depending on the quantity, rice variety, and desired consistency. On average, it takes about 45 minutes to 1 hour to cook kheer on low heat. The rice should be tender, and the milk should thicken to a creamy consistency.
Q: Can I make kheer in advance?
A: Yes, you can make kheer in advance. It can be stored in the refrigerator for 2-3 days. However, note that the kheer tends to thicken when refrigerated. Before serving, you may need to add a little warm milk to restore its consistency.
Q: Can I freeze kheer?
A: It is not recommended to freeze kheer as the texture may change when thawed. The milk can separate, and the rice grains may become mushy upon thawing. It’s best to enjoy kheer when freshly made or store it in the refrigerator for a few days.
Q: Can I add other flavors or ingredients to my kheer?
A: Absolutely! Kheer is a versatile dessert, and you can experiment with various flavors and ingredients. You can add crushed cardamom pods, saffron strands, rosewater, or even a pinch of nutmeg for extra aromatic notes. Additionally, you can incorporate roasted nuts like almonds, pistachios, or cashews, as well as dried fruits like raisins or chopped dates for added texture and sweetness.
Q: Can I make kheer without sugar?
A: Sugar is a common sweetener used in kheer, but you can adjust the amount according to your taste preferences. If you want to avoid sugar altogether, you can use natural sweeteners like honey, maple syrup, or jaggery (unrefined cane sugar) as alternatives. Adjust the quantity to suit your desired level of sweetness.
Q: Can I use non-dairy milk alternatives to make kheer?
A: Yes, you can use non-dairy milk alternatives such as almond milk, coconut milk, or soy milk to make a vegan version of kheer. Keep in mind that the flavor and texture may vary slightly from traditional kheer made with dairy milk.
Try our Other Dessert Recipes
Please be sure to rate this recipe or leave a comment below if you have made it. For more vegetarian & non – vegetarian inspirations, Sign Up for my emails or follow me on Instagram, Youtube, Facebook, Twitter or Pinterest.
Kheer Recipe Card
Equipments
Ingredients
- 1 litre Milk
- ¼ cup Rice (raw grain)
- ¼ cup Almonds
- Sugar as required
- ¼ cup Raisins
- 4-5 Green Cardamoms/1teaspoon cardamom powder
- 200 ml Condensed Milk
Instructions
- Begin by washing 1/4 cup rice thoroughly to remove any impurities. Keep in mind that rice should be half cut, don't use basmati rice in kheer. 2. Then, soak it in water for about 30 minutes. This step ensures even cooking and a creamy texture.3. In a heavy-bottomed pan, bring 1 litre milk to a gentle boil. Stir occasionally to prevent it from scorching.4. Drain the soaked rice and add it to the boiling milk. Lower the heat to a simmer and cook until the rice is soft and tender. Stir occasionally to prevent sticking.5. Once the rice is cooked, add sugar as required, 3-4 green cardamoms and 1/4 cup chopped almonds.6. Afterwards append 1/4 cup raisins in to the kheer. Stir well to combine all the ingredients.7. Add 200ml condensed milk to give extra taste and thicken the kheer.8. Allow the kheer to simmer on low heat for another 15-20minutes, stirring occasionally. This slow cooking process allows the flavors to meld together, and the rice to absorb the milk, resulting in a thick and creamy consistency.9. Once the kheer reaches the desired consistency, remove it from the heat. Garnish with a sprinkle of chopped nuts, saffron strands or rose petals for an elegant touch. Serve warm or chilled, depending on personal preference.Your Delicious Kheer is ready
Video
Notes
- Make sure to soak the rice before cooking helps in achieving a softer texture and even cooking.
- Full-fat milk is recommended for a rich and creamy kheer, but you can use low-fat milk as well.
- Slow-cooking the kheer on low heat allows the rice to cook evenly and absorb the flavors of the milk.
- Aromatic spices like cardamom, saffron, and rosewater enhance the flavor profile of the kheer.
Yummy dessert. I tried it as you said in this blog and really my dish makes very delicious. Thanks North Indian Kitchen
Thanks for your feedback. We are very glad that you like our recipes.